Deveopment Environment#
You are welcome to use any development environment that works for you. A great developer makes great use out of the tools they’re given. This note describes how to setup the environment that I recommend. I urge you to start with this environment because I know it works (or I’ll know how to fix it if it’s broken).
Software Requirements#
You these tools to do the work in the class:
The Google Cloud SDK
Visual Studio Code with Extensions:
Remote WSL (Windows Only)
Docker Desktop (Windows and Mac Only)
That’s lot! Please read the recommendations for your platform.
In the Cloud: The Easy Way#
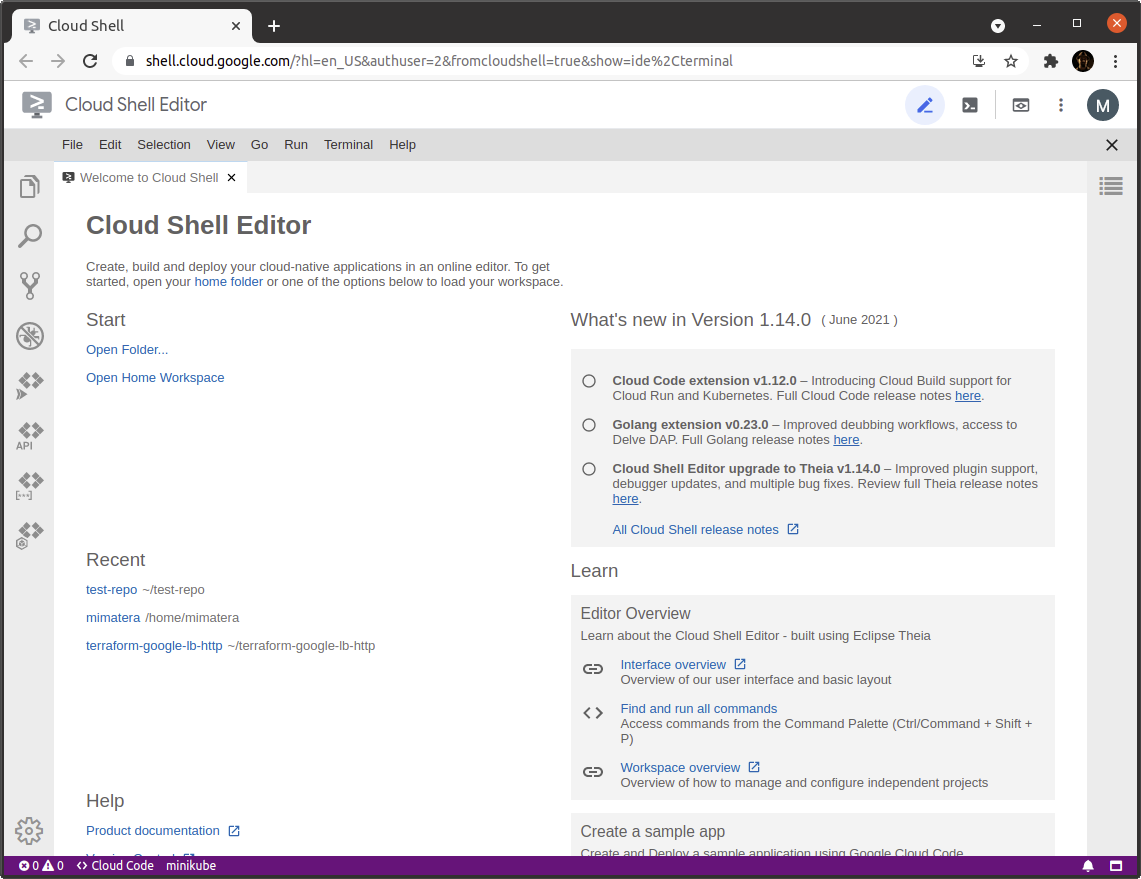
Once you have access to Google Cloud Console you’ll be able to access the Cloud Shell Editor as shown in class. As you can see from the picture below the Cloud Shell Editor is similar to vscode. It’s based on Apache Thea, a close cousin of vscode.
The editor runs on a Linux VM with all of the software installed except for Ansible. To install Ansible follow the instructions below:
python3 -m pip install pip
pip install ansible
The editor is all you need for the course and has some real advantages, like being available wherever you need it. The disadvantage of the cloud shell editor is that it’s slower and less responsive than running vscode on your own machine. The VM that runs the cloud shell editor is quite limited so you may not be able to build and run larger Docker containers, which may be a problem for CIS-92.
Installation on Ubuntu#
Installing on Ubuntu is the easiest and most reliable way to install the requirements on your own computer. Each of the requirements links above have instructions for Ubuntu. I recommend using the package manager to install everything. Here’s a summary of the steps that I used to get my computer ready:
0. Make Sure curl is Installed#
The curl program must be installed and is used by the next steps.
sudo apt install curl
1. Install Google Cloud SDK#
sudo apt update
sudo apt-get install -y apt-transport-https ca-certificates gnupg
curl https://packages.cloud.google.com/apt/doc/apt-key.gpg | sudo apt-key --keyring /usr/share/keyrings/cloud.google.gpg add -
echo "deb [signed-by=/usr/share/keyrings/cloud.google.gpg] https://packages.cloud.google.com/apt cloud-sdk main" | sudo tee -a /etc/apt/sources.list.d/google-cloud-sdk.list
sudo apt-get update -y && sudo apt-get install -y google-cloud-sdk
2. Install Terraform#
sudo apt-get update && sudo apt-get install -y gnupg software-properties-common curl
curl -fsSL https://apt.releases.hashicorp.com/gpg | sudo apt-key add -
sudo apt-add-repository "deb [arch=amd64] https://apt.releases.hashicorp.com $(lsb_release -cs) main"
sudo apt-get update && sudo apt-get install terraform
3. Install Python and Ansible#
sudo apt install -y python3-pip
python3 -m pip install pip
pip install ansible
4. Install GIT#
sudo apt install git
5. Install Podman (Replaced Docker Engine)#
sudo apt install -y podman
6. Install vscode#
I use the snap package manager to install vscode.
sudo snap install code --classic
You have to install vscode extensions manually using the extension manager.
Windows Installation#
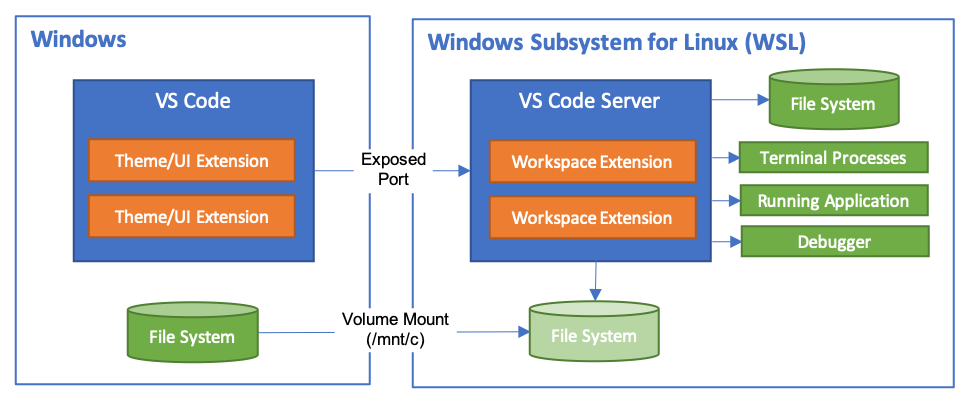
There are two ways you can go on Windows, install all of the software natively or install it in Ubuntu using WSL2. I recommend using WSL2 because it gives you an Ubuntu environment that is very similar to the cloud editor and the native Ubuntu setup. The Developing in WSL guide gives you an overview of how it works.
Here’s an overview of the process:
Install Windows Subsystem for Linux (Version 2)
Install Docker Desktop for Windows and enable the WSL2 backend.
Install Visual Studio Code for Windows
Once you have WSL2 running and are connected using vscode follow steps 1 through 4 of the Ubuntu installation process.
Installation on MacOS#
I don’t have a Mac to try this procedure on and this is the first time I’ve taught the class. The process I recommend is similar to the way vscode works on Windows except that development is done in an Ubuntu container, rather than a WSL VM. See this document on [Developing Inside a Container)[https://code.visualstudio.com/docs/remote/containers]. Notice that the picture is almost identical to the WSL method. On a Mac you will:
Install Docker Desktop (See the installation section for an important note on file sharing with your Mac)
Install vscode and extensions
Connect to an Ubuntu container and follow the Ubuntu installation instructions steps 1 through 4